
Insert an image
There are multiple ways to display an image on your website. You can create a whole gallery of them. You can also position and resize them so that they blend well with the text.
1.) From your dashboard, navigate to the post, page, or event you’d like to insert an image into. In our example, it’ll be a page.
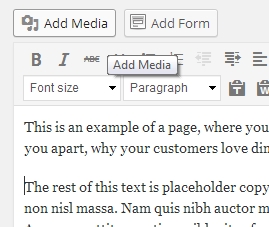
2.) Inside the content box, click on what part of the page you’d like to insert the image into. In our example, we want to insert by the 2nd paragraph. Click on the Add Media button afterwards.
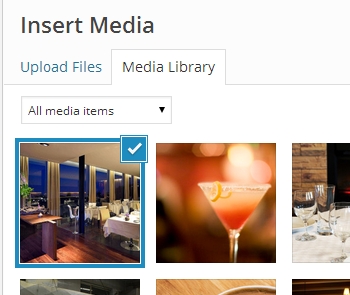
3.) On the Insert Media box that popups, you can either insert an existing image from your media library or upload a new one.
To insert an existing one, simply select that image.
To upload a new one, select the Upload Files tab, click on the Select Files button, navigate to the folder where your image is on, select it and click on the Open button to start the upload. Once the upload is done, the image is automatically moved inside the Media Library tab with the existing ones and selected.
4.) On the right section of the popup box are the Attachment Details of the currently selected image. Here you can provide title and caption for the image.

Title : appears when the image is linked to media file (explained later) and clicked on by the user to view it in full. (screenshot: http://i.imgur.com/PQM15Ok.png)
Caption : visible text right under the image. (screenshot: http://i.imgur.com/hFl8K0t.png)
Alt Text : though not necessary and in most cases not visible, this helps identify what the image is about in cases where the image doesn’t load, is broken, or have been mistakenly linked from.
Description : highly optional.
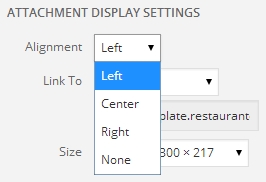
5.) Further down the same section are the Attachment Display Settings. Here you can configure how the image displays on the page.
Alignment – This is how the image is position with respect to the rest of the page.
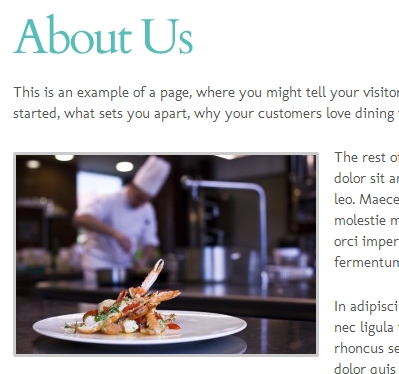
Left : the image floats to the left, with text bordering above, below and to its right. (screenshot: http://i.imgur.com/PZAiJOI.jpg)
Center : the image is centered, with text only above and below it. (screenshot: http://i.imgur.com/Yhh1PcW.jpg)
Right : opposite of left as described.
None : the image is positioned by default to the left, with text only above and below it, and bordering on neither left nor right.
6.) Link To – This is how the image interacts with the viewer.
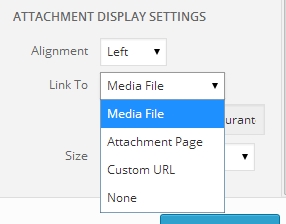
Media File : the image links to its full size. By default, when the image is clicked by the user, a popup box appears containing the image in full size. (recommended for high-resolution photos where the size is too wide to fit the page)
Attachment Page : not recommended as it links to a new page with only the photo in it.
Custom URL : enables the option to link the image to another page on the site, or an external web page. (e.g. a TripAdvisor badge that links to your TA profile)
None : clicking on the image does nothing.
7.) Image Size – automatically set the image to a pre-defined size.
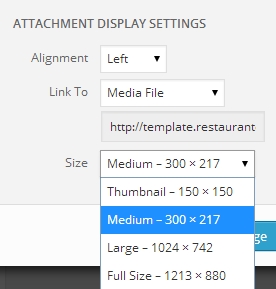
Note: Your website’s content width doesn’t go more than 940px so it’s best to either set your image at full size (if it’s 900px or less in width), medium or thumbnail.
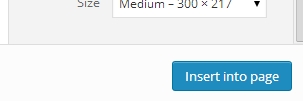
8.) Once you’re done, click on the Insert into page button situated on the lower-right corner of the popup box.
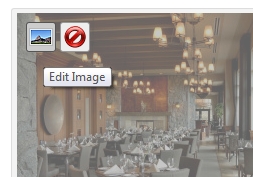
9.) If you wish to edit or delete any insert image, simply click on one and select the appropriate action.
10.) Click on the Publish/Update button of your page once you’re done inserting images to save your changes.
That’s it! Here are related tutorials you might want to check out as well: